
Design Your Own Stocks… Be The
Photo Chemist DRT
Photo Chemist DRT
What is Film Photography?
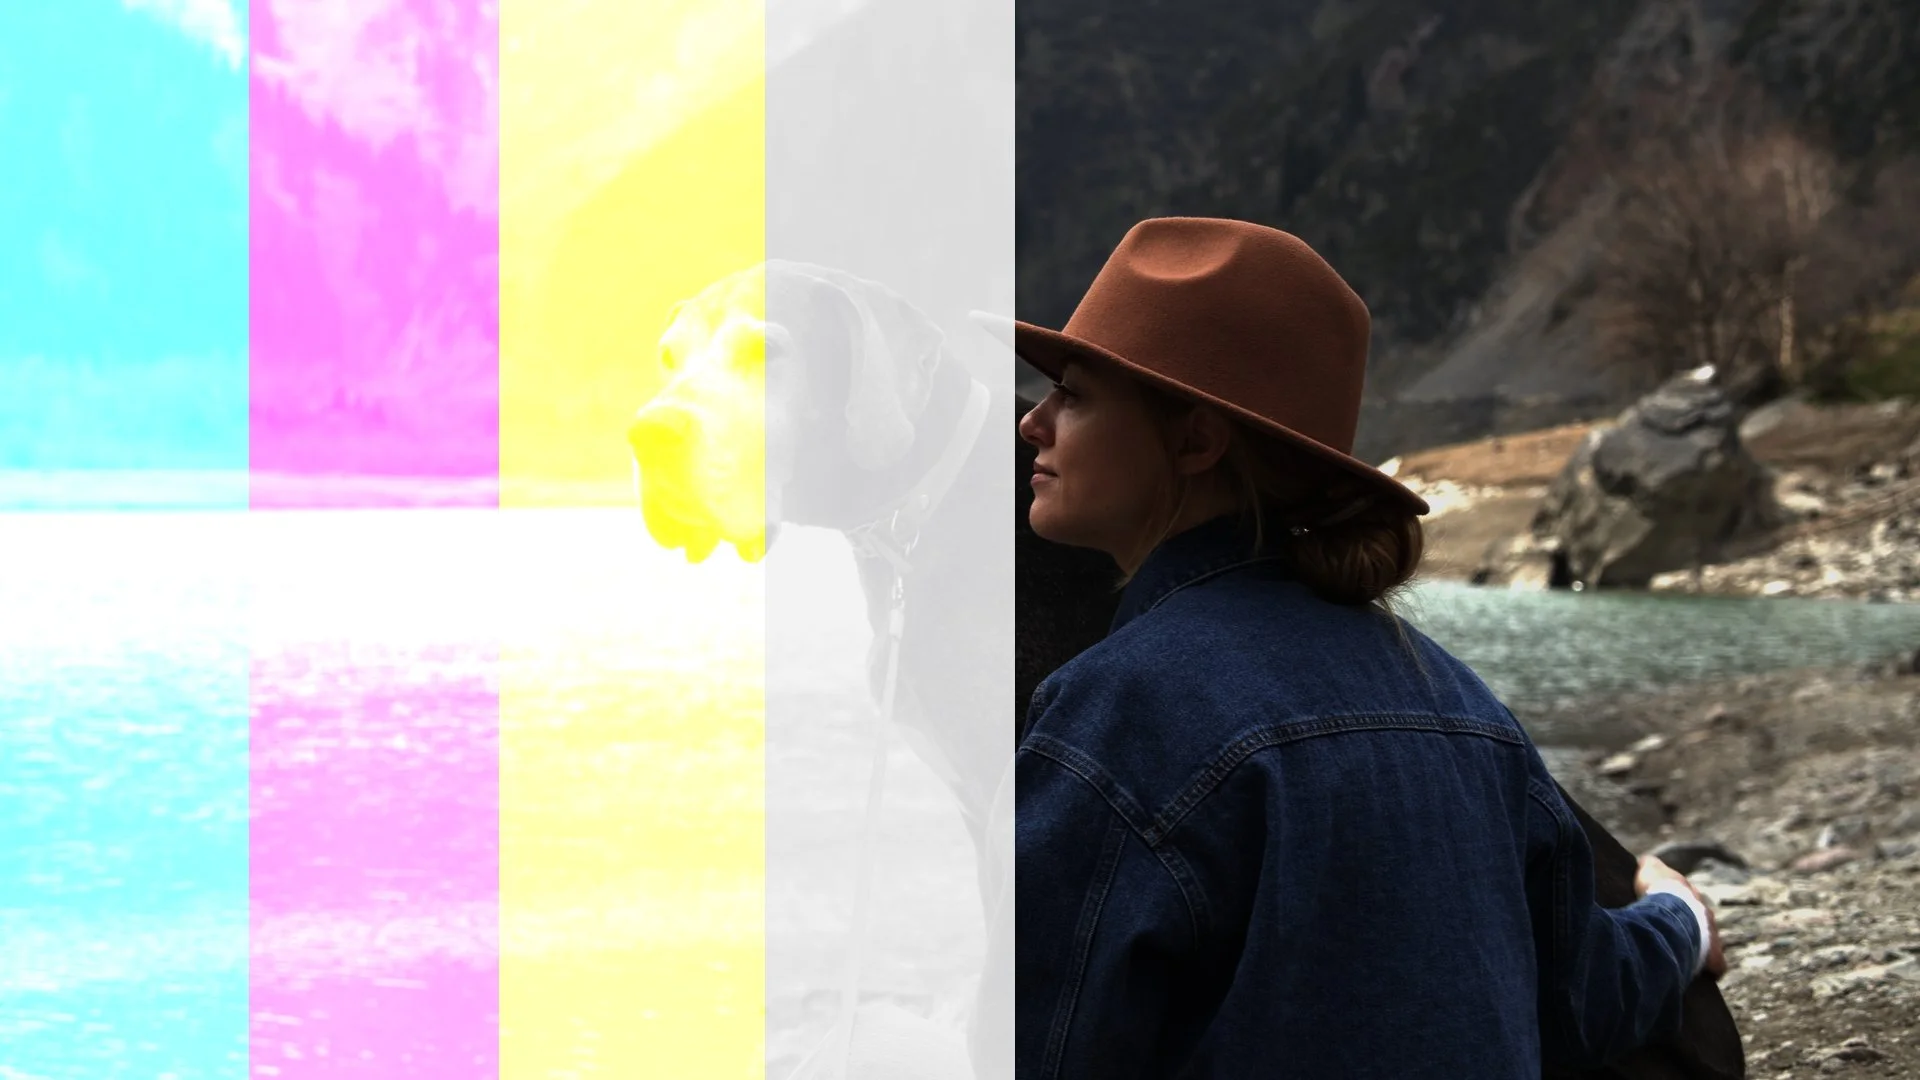
Film is not just “old-school digital.” It’s a chemical system.
Light strikes silver halide crystals in the emulsion → tiny dye molecules interact → the invisible latent image is revealed during chemical development.
This chain of physics and chemistry is why film looks richer, softer, and more natural than digital sensors.
PhotoChemist simulates this entire process in software — step by step, from photons to final print — so your images look like they were made in a darkroom, not just filtered.
Get access to all the tools you see on YT and any updates that happen. One low annually fee. Just $47.34 - Will never be raised and gets you all the tools, all the updates
This plugin takes your footage and runs it thru a 17+ stage system to develop your digital film just like a photo chemist would. From defining the stocks and their behavior to finishing and developing with various processing techniques.
As an FYI until I write up more documentation… It expects a Davinci Wide Gamut Linear Input. But check out the get started section below for installation and module tutorials.
If you have any issues. Email me at create@dec18studios.com and I’ll try to fix the the problem
Meet The Photo Chemist… You!
-
Reality: Film doesn’t see “RGB.” It reacts to the full spectrum of light (360–780nm).
Simulation: We reverse-engineer your digital RGB into a 43-band spectrum using the dye sensitivity controls to estimate the potential for Silver Halide to become Metallic Silver and which dictate where the Emulsion dyes form. This ensures physically correct light distributions.👉 Why it matters: Different films stocks “see” different parts of the spectrum.
-
Once we map where activation will probabilistically occur for silver we adjust the shape of the density response the the HD curves, taking what was once a linear Scene exposure mapping and shaping it so the shadows hang on longer and the highlights roll off nicely.
Additionally it is during this step that texture is calculated. Grain is introduced by inciting random points in which Silver Halide that should have activated fails to activate and thus will leave create a slightly different density than the area around it. Halation draws upon the orginal exposure intensity map that was created and models locations where backscattering light that bounced back thru the stocks would have effected the exposure. Leaving a slight redish halo bleeding into the edges surrounding highlights.👉 Why it matters: This is why film has graceful highlight rolloff and rich shadows, instead of the linear clipping you get from digital sensors and grain is natural and built into the responsive activation of the silver.
-
Dyes (cyan, magenta, yellow) are simulated as asymmetric Gaussian absorption curves, matchable to real film chemistry.
👉 Why it matters: Real film is all about these dyes and understanding how they block light. Density being what wavelenghts they absorb and Transmission being what they let pass thru… What we see at the end of the process is the Transmission of the Projector light that remains…
-
Controls at this stage effect our latent image development as we process the metallic silver in preparation for developing our dye emulsions. Push Pull is the most common adjustment tweaking the time that film stock would sit in the developer agent allowing more or less dye to form where the metallic silver is present.
-
Bleach Bypass - Controls how much of the metalic silver is washed away or retained during the development process.
Midtone Expansion, Developer Competition, Chroma Expansion, Dye Inhibition, Spectral Seperation - are all various subtle adjustments that account for various aspects of stock design and development processes to create the richest tones and colors.
Bias Controls - These are per layer adjustments to the main bleach bypass controls.
-
After developing our stocks and converting the metallic silver into the wavelength blocking dyes we model with transmission thru medium using Beer’s Lambert Law. The controls here allow for you to design the color/tint of the light along with it’s power. What you see on the screen is the your original input colors, or the dye colors, but rather it is the light that remains after simulating it passing thru the composite dyes and their relative density/transparency.
Getting Started
Installing the PhotoChemist Ofx
I’m not in the apple developer program and I really only made this tool for myself. So it is only been built and tested on mac os and there is no windows version. (possibly someday I will make a windows version) But here is how to install for Mac computers.
Download the Demo or the Full Version.
Unzip The Bundle
Open your DaVinci Resolve LUT folder:
macOS:
/Library/OFX/Plugins
Copy the Ofx Bundle into this location.
Restart Resolve. (Possibly tell Apple to trust this application in security settings)
If apple tells you to delete it. Don’t Go to security settings and say allow anyways. Restart Resolve and you’ll get warned again but the prompt will let you open anyway.
You might need to go into Resolves plugin manager and make sure the OfX box is check and then restart Resolve one more time.
Photo Chemist should now be available to apply with from your effects library.
The Controls & What They Do
It may seem overwhelming at first but play around and it will soon make sense. The plugin expects a linear input and that’s really the only prerequisite…
Learn more about the different controls by scrolling down or clicking a direct link.
Videos are coming soon.
Quick Processing Tools
Theater Screen sim makes a small adjustment to the black point of the image reflecting the nature of being in a theater with light bouncing to and reflecting off the screen.
Presets are quick setting adjustments for quickly jumping to various styles as a starting point for designing your film stock.
These are the most powerful controls you have and the have been conviently placed so you can make adjustments with the first 8 dials on your mini panel if so choose.
Printer Points and power effect the color and lume strength of the light that is used to pass thru your negative stock and activated the silver of your print stock.
These work linearly but are geared with values you expect.Projector Light and Power, similar to printer points but is the brightness power and color of your projector and the light that remains after passing thru your print stock…. This is what you see.
These work linearly and you can think of the R,G,B values at as 1,1,1 and make adjustments like you would a color wheel.
Input Conditioning
Our input is in linear. We start there and in essence you could say we end there. But for the magic to work we want to tell the system approximately how many stops did the camera see and how many does our negative have to work with.
Enable Rescaling - Is currently I/O switch for this mechanism, it will one day be a blend slider between On and Off
Input and Target… they don’t have to be accurate, just make it look good.
Pivot changes where ‘mid-grey’ should lie
Exposure Offset effects a brightness adjustment if something goes awry
Saturation Awareness accounts for maintain original input saturation during this process.
Film Development
These controls make adjustments to how your exposed image is developed. How the activated silver creates and forms dye.
Push/Pull is how long it sits in developer allowing the dye to form.
Bleach Bypass dictates how much metallic silver is retained.
Competition & Inhibition effect how well the developer works and if the stocks have controls to make sure they develop evenly.
Expansion and Protection make small adjustments to the process.
Spectral Sharpening does something somehow and it’s related to saturation and color contrast in the dye formation.
Bias controls make small tweaks to the bleach bypass process and how silver in each layer is retained.
Grain & Halation
These controls make tweaks to the overall nature of the individual metallic silver that was activated and exposed. Grain creates little pockets in the final density letting more light transmit and Halation eats away at the edges near over exposed parts of the image with a back scattering effect.
Grain Amount - More grain!
Density falloff controls how grain develops in different parts of the exposed image.
Neg - Print Balance… Grain only in the negative, print, or both!
Remjet layer for halation - How strong should we prevent halation from happening.
BackScatter Radius. High values mean lower mm stocks.
Threshold makes targeting a breeze.
Net to Postive Blend… Usually should be more negative heavy for best results.
Stock Design
This how you design your stock. From how it interacts with the incoming light to the type of dye that is formed. Each layer has it’s own set of controls and some have a global for group adjustments.
Dye Sensitivity
K - A probability calculation to determine how likely the sliver would have activated.
Peak & Sigma - This is a curve shape related to what wavelengths of light would cause the layer to react. Peak is where 100% activation could occur and the Sigma determines the width.
Spectral Height adjusts how high off of a baseline should we draw this curve.
2. HD Curves
These shape, compress and rolloff the shadows and the highlights, the steepness of the line in between the min and max
3. Dye Colors
Similar to sensitivity the different dyes block different wavelengths of light. this lets you set a peak, height, an asymmetric width and minimum baseline.
Input Output Config
This allows you to make adjustments to the processing flow.
Input - It wants Linear… It probably will always want it do to some complexity in the calculations. Recommend just put a cst with no ton mapping right before the node to get to linear from your timeline space.
Processing Mode - Lets you do everything in one node or once your look is set you can split it into two nodes and do stuff in the middle with neg only and print only.
View mode lets you see the negative and the final, but also see how the layers look at different stages.
Diagnostics | Help you see how things you tweak do things.
Lut Prep | If your rendering a show lut this will turn off any textural adjustments like grain and halation.
Installing the DRT
Photo Chemist DRT Ofx for Resolve
Download the Bundle
Unzip The Bundle
Open your DaVinci Resolve LUT folder:
macOS:
/Library/OFX/Plugins
Copy the Ofx Bundle into this location.
Restart Resolve. (Possibly tell Apple to trust this application in security settings)
If apple tells you to delete it. Don’t Go to security settings and say allow anyways. Restart Resolve and you’ll get warned again but the prompt will let you open anyway.
You might need to restart Resolve one more time.
OpenDRT will be now available to apply with a DCTL node.